You’re about to join millions of entrepreneurs who’ve turned their business dreams into reality with Shopify, and I’m here to show you exactly how it’s done. Starting your own online store might seem daunting, but I promise you – with Shopify, it’s way easier than you might think. I’ve helped countless friends set up their stores, and I’m thrilled to walk you through every step of the process.
🔍What is Shopify and is it Right for You?
Think of Shopify as your all-in-one digital storefront wizard that has become the go-to platform for online stores worldwide. It’s like having a retail space, a cash register, a tech team, and a business manager all rolled into one powerful platform. Unlike a physical store that might cost you thousands to set up, with Shopify you can launch your first store this week!
You don’t need to be a tech genius to use it. If you can use social media, you can run a Shopify store. The platform handles all the complex technical stuff behind the scenes, from secure payments to website hosting, while you focus on growing your business.
🔍What makes Shopify stand out:
✅Complete solution – everything from website hosting to payment processing in one platform
✅Beginner-friendly – if you can use social media, you can run a Shopify store
✅Scalable – perfect for both small crafters and large enterprises
✅Powerful app store – endless possibilities to extend your store’s functionality
✅Built-in marketing tools – SEO and promotional features to help you grow
Today, Shopify powers over 4 million stores worldwide – from small craft businesses to massive brands you probably shop from regularly.
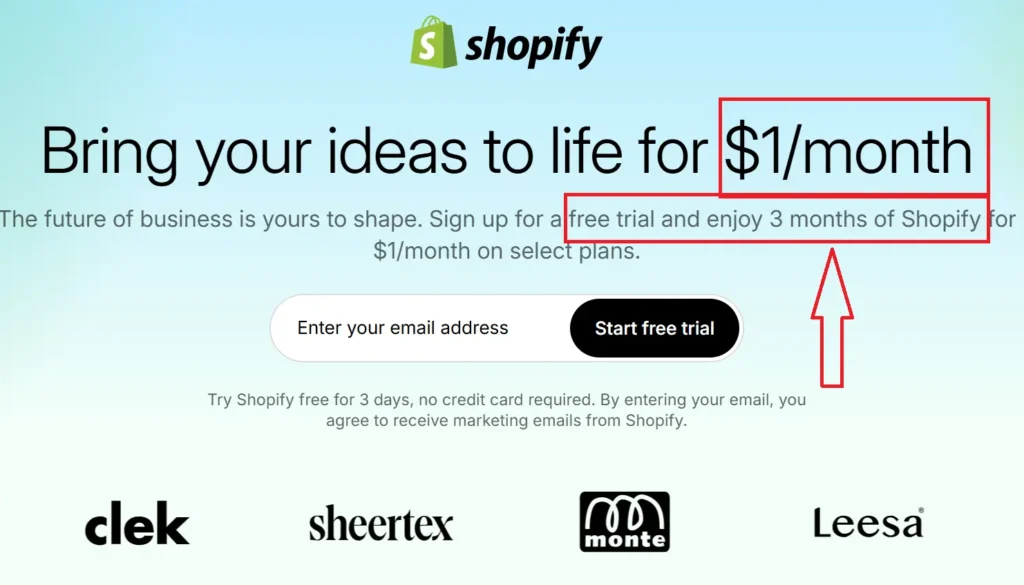
🚀 Want to join them? Shopify offers a 3-day free trial + 3 months of Shopify for just $1, so you can try out the entire platform risk-free!
👉 Click here to head over to Shopify, enter your email, and hit the “Start free trial” button
🔍What Can you Sell on Shopify?
The million-dollar question: what should you sell? Let’s approach this strategically. The sweet spot lies at the intersection of three things: your passion, market demand, and profit potential.

🤔Start by asking yourself these questions:
🧠What are you genuinely interested in or knowledgeable about?
🧠What problems can you solve for people?
🧠What products do you wish existed but can’t find?
💡Pro Tip: Don’t just chase trending products – they often fade as quickly as they rise. Instead, look for consistent demand in your chosen niche. Use tools like Google Trends, social media insights, and Amazon’s Best Sellers to research what people are actually buying.
The Launch Journey: Step-by-Step Guide
Now that you understand what Shopify offers and have your product ideas ready, let’s roll up our sleeves and build your store! I’ve broken down the entire process into six manageable steps that will take you from signup to launch. Don’t worry if it seems like a lot – we’ll tackle each step one at a time, and I’ll guide you through every detail.
The 30-Minute Setup
Let’s get your store up and running! Shopify has designed their platform with new entrepreneurs in mind, offering an incredibly generous trial program:
✅3-day free trial, no credit card needed – Test drive the platform without any financial commitment. You’ll get full access to explore every feature and tool Shopify offers.
✅3 months for just $1 – After your trial, continue building your store for less than the price of a coffee. This gives you plenty of time to set up your store properly before launching.
✅Full access to all features – Nothing is locked away or limited. You’ll get the same powerful tools that established brands use, from professional themes to advanced analytics.
👉Take advantage of this special offer!
Step 1: Create Your Free Shopify Account
Ready to get started? First, enter your email to create your free Shopify account here. Once you’re in, you’ll have access to your Shopify dashboard, where the magic of building your online store begins!

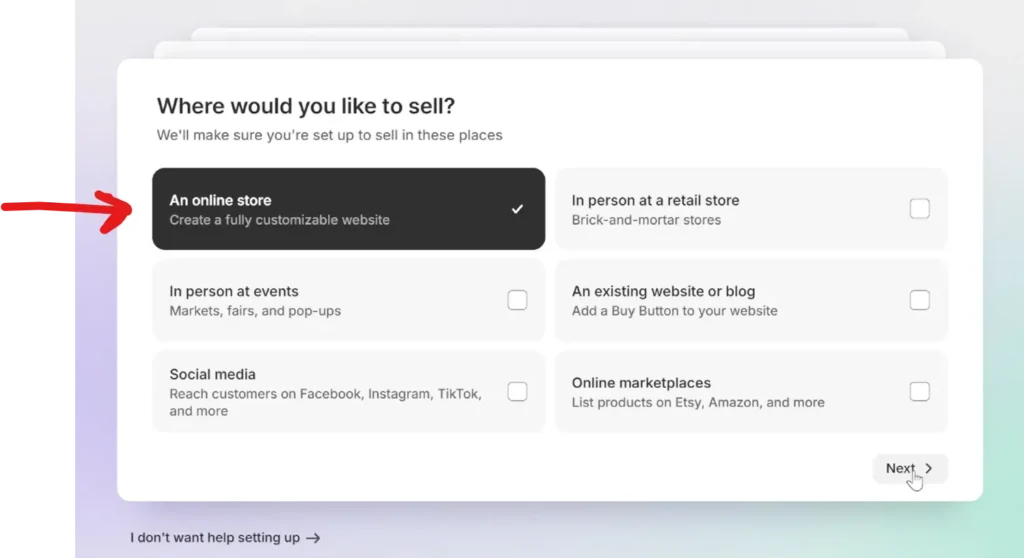
Where would you like to sell? Select “An online store” and then click on “Next”.
Which best describes you? Select “I am not selling yet”. Then click on “next”.

What do you plan to sell? You can select one or more of the options if you are sure what you want to sell or you can simply select “I’ll decide later”.

To choose the best plan for you, if you are a beginner I recommend selecting “Try Basic” and entering your payment information to get started. After your 3-days trial is over they will charge you $1 every month for 3 months.

💡Pro Tip: Use this 3-day trial period strategically! Plan your setup tasks in advance so you can make the most of your free access. Then use your $1 first 3 months to fine-tune everything before your grand opening.
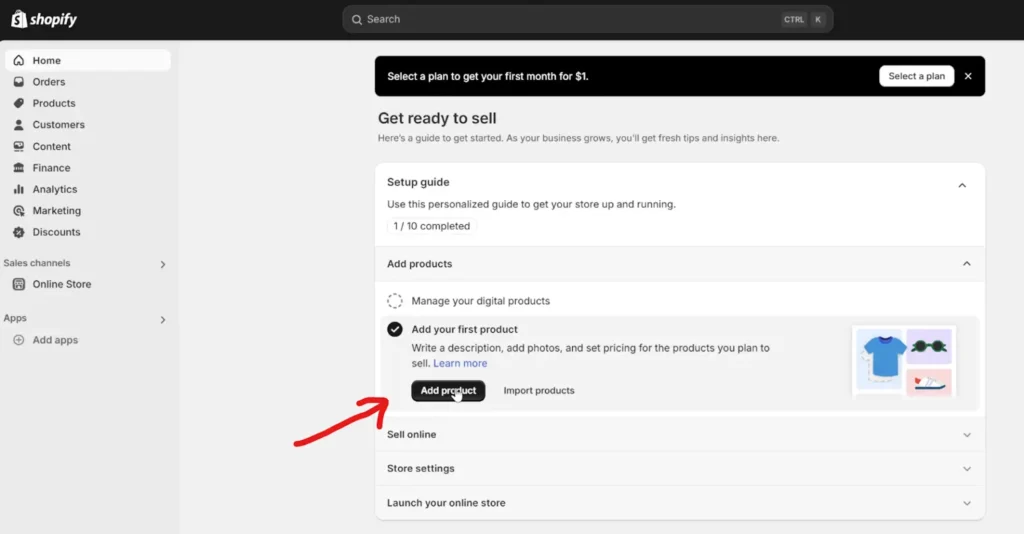
Step 2: Set Up Your Shopify Dashboard
Welcome to your Shopify dashboard! It might look a bit overwhelming at first, but think of it as your store’s command center. We’ll break it down together.

Step1: Add your first product.
Step2: Sell Online. Click on “Customize theme”.

Step3: Click on “Online Store.”
Look to the left-hand side of your screen and click on “Online Store.” This is where all the fun begins—customizing how your shop looks to the world.

Step 4: Visit the Theme Store.
Scroll down and hit the “Visit Theme Store” button. This is like walking into a shop filled with different store designs. You’ll find one that fits your vibe perfectly.
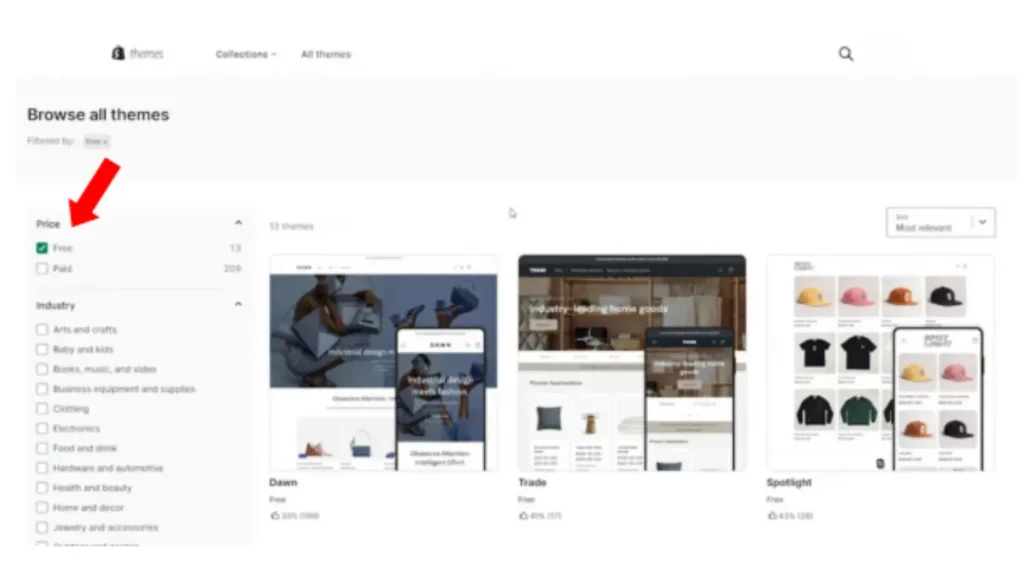
Step 5: Choose a theme.
Shopify gives you 100+ designs to start with. If you’re brand new, don’t overthink it — just grab one of the free themes and start customizing. You can always upgrade later once sales start coming in.

💡NOTE: If you are feeling a bit overwhelmed, check out Shopify’s free learning center. It’s packed with awesome tutorials that’ll walk you through everything you need to know about adding products to your store. Trust me, it’s a game-changer for avoiding those rookie mistakes and building your confidence!
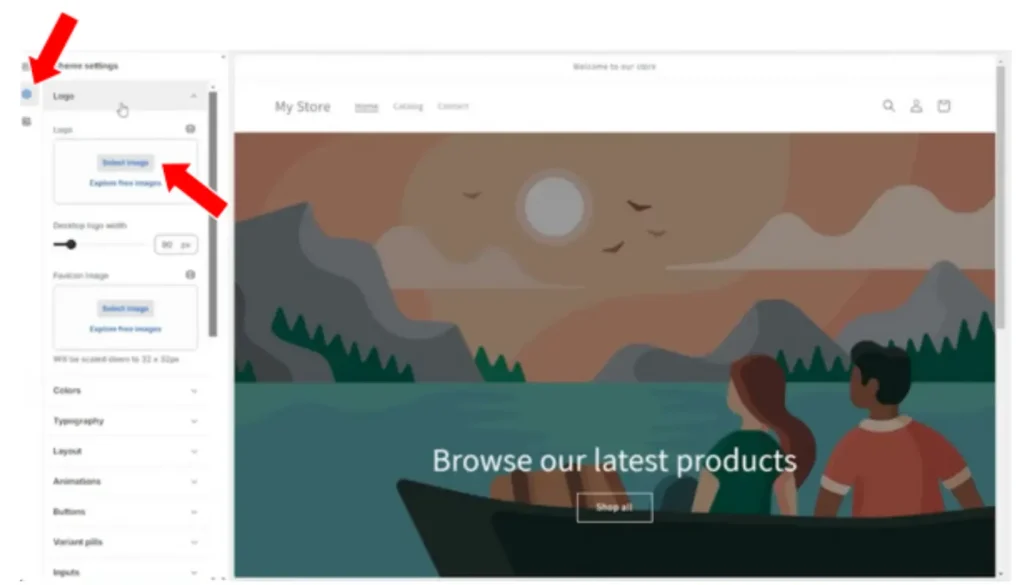
Step 6: Open theme settings for customization.
On the left-hand side, click “Theme Settings.” This is where you can tweak everything—colors, fonts, images—to make your store uniquely yours.

Step 7: Upload your logo.
Click the “Logo” tab, then upload your logo by dragging and dropping the image.
💡 Reminder: Don’t get stuck in design perfectionism – just get started and you can improve it daily.
Step 3: Pick Your Domain Name
Your domain name is your store’s address on the internet. Shopify offers two options:
- Get a free myshopify.com domain (like yourstore.myshopify.com)
- Purchase a custom domain. For an online shop a branded .store domain name is the perfect choice.

💡My advice? While the free domain works for testing, invest in a custom domain before launching. It looks more professional and builds trust with customers. Keep it:
✅Short and memorable
✅Easy to spell
✅Related to your brand
✅Free from hyphens and numbers if possible
👉 Get a custom domain here: Buy .STORE Domain – Register .store Domain Name
If you already got a domain from another provider, you can easily connect it to your Shopify store and start building your brand.
Step 4: Shipping and Delivery
Shipping and delivery is an essential part of running your online store, and Shopify provides built-in features to streamline the entire process.
The platform offers comprehensive tools for both merchants handling their own shipping and those working with fulfillment partners. Understanding the shipping process ensures your products reach customers efficiently and cost-effectively.
Taxes are another crucial aspect of running your online business. Each jurisdiction has specific requirements for collecting and remitting taxes based on your business location and where your customers are situated. To understand your tax obligations, review the tax documentation provided by Shopify.
Setting up your shipping preferences is straightforward. Navigate to Settings > Shipping and Delivery in your dashboard. The Shipping rates section allows you to establish different rates for various geographical regions, giving you full control over your shipping strategy.
Want to become a shipping pro? Check out Shopify’s complete shipping guide – it’s got everything you need to know about getting your products safely to your customers!
Step 5: Payments
Taking payments from your customers is one of the most exciting parts of running your store, and Shopify makes this whole process smooth and simple.
Your store comes ready with Shopify Payments, the built-in payment system that lets you start accepting credit cards right away. No complicated setup needed – just a few clicks and you’re ready to make your first sale. The best part is watching those sales notifications roll in while the system handles everything behind the scenes.
Want to dive deeper into all the payment options available for your store? Visit the Shopify Payments guide to discover all the possibilities for your business.
Your customers’ security is a top priority. That’s why Shopify has built-in protection including PCI compliance and smart fraud prevention – all working around the clock to keep transactions safe. For complete peace of mind, take a look at the security documentation to see all the ways Shopify protects your store.
Getting your payment settings up and running is a breeze. Simply head to Settings > Payments in your dashboard to activate Shopify Payments or add other payment methods. Everything you need to track your money – from transaction fees to payout schedules – is right there in one convenient spot.
Step 6: Place a Test Order
Setting up your beautiful new store is an exciting milestone, and now it’s time for the first behind-the-scenes peek at how your customers will experience shopping with you.
Think of a test order as your store’s dress rehearsal – a perfect opportunity to walk through the entire shopping journey. From checking your shopping cart display to shipping calculations and thank-you pages, this step ensures your store is ready for its grand opening.
Follow this step-by-step guide from Shopify to run your first test order and ensure everything flows perfectly from browse to buy.
Step 7: Going Live With Your Store
Launching your Shopify store marks an exciting milestone in your entrepreneurial journey. Let’s ensure everything is perfectly positioned for your grand opening.
Select Your Perfect Plan: The Basic Shopify Plan plan starts at $29 monthly – an excellent foundation for new entrepreneurs stepping into ecommerce. Moving up, the Shopify plan at $79 monthly offers expanded capabilities, while the Advanced plan at $299 monthly caters to high-volume sellers. (Pricing may vary by location.)
Read about Shopify pricing plans to explore each option in detail. Remember, starting with Basic allows you to scale up as your business flourishes.
Fine-Tune Your Store: A polished store creates trust. Ensure your product listings shine with accurate pricing, compelling photography, detailed descriptions, and a seamless checkout experience. Review the store launch checklist to verify every element is perfectly aligned.
Open Your Digital Doors: When you’re ready to welcome customers, remove your store password through Online Store > Preferences in your Shopify admin. Your store will be accessible at either yourname.myshopify.com or your custom domain.
Learn about domain setup to establish your unique web address and start accepting orders from around the world.
What’s Next?
You’ve learned the steps to launching your very own Shopify store, from setting up your account to choosing your products and customizing your store. But the most important step is taking action.
Nothing you’ve read here will make a difference until you start implementing. The best part is, with Shopify’s 3-day free trial and 3 months for just $1, there’s no better time to dive in and get your store live.
Don’t wait for the “perfect” moment — start today, and you’ll be amazed at what you can achieve in just a few months.
👉 Start your Shopify journey now with 3 months for just $1.
The sooner you take action, the sooner you’ll be on your way to building a successful online store!
🔍You might also enjoy the following post:
👉 How to Promote a Shopify Store: A Beginner’s Guide to eCommerce Success