So, you want to build your first website? That’s awesome! I remember how overwhelming it felt when I first started, but don’t worry—I’ll guide you through everything you need to know. These days, building a website is easier than you might think, especially with modern website builders that simplify the entire process.
Creating your own website comes down to these three main steps:
✅Step 1: Choose your website platform – where you’ll build your site
✅Step 2: Set up your domain name and hosting – your site’s address and home on the internet
✅Step 3: Design and customize your website – make it look exactly how you want
Don’t worry if that sounds technical – I’ll explain everything in simple terms you can follow. Let me break it down into simple, manageable steps that’ll get you from zero to having your own corner of the internet. Trust me, you’ve got this!
💡Pro Tip:
If you’re looking to build an online store rather than a standard website, Shopify is the perfect platform for you. It’s specifically designed for e-commerce, offering everything you need to start and grow your business. If you’re new to Shopify, you can check out this complete guide on how to build your store on Shopify to get started.
Disclaimer: Our website is reader-supported. If you purchase any service through our partner links, we may earn a commission at no extra cost to you.
Step1: Choose your website platform
Think of a website platform as your digital construction site. It’s where all the magic happens!
WordPress is the most popular choice – as of January 2026, around 43.8% of websites on the internet use WordPress. It’s super flexible, has tons of plugins and themes, and you can start simple but grow into more complex features as you learn. Plus, there’s a huge community ready to help if you get stuck.
Step 2: Set up your domain name and hosting
Alright, let’s get your future website a proper home on the internet! You’ll need two essential things: a domain name (like www.yourwebsite.com) and hosting to store all your website’s files.
For reliable and budget-friendly hosting, I always recommend Hostinger.
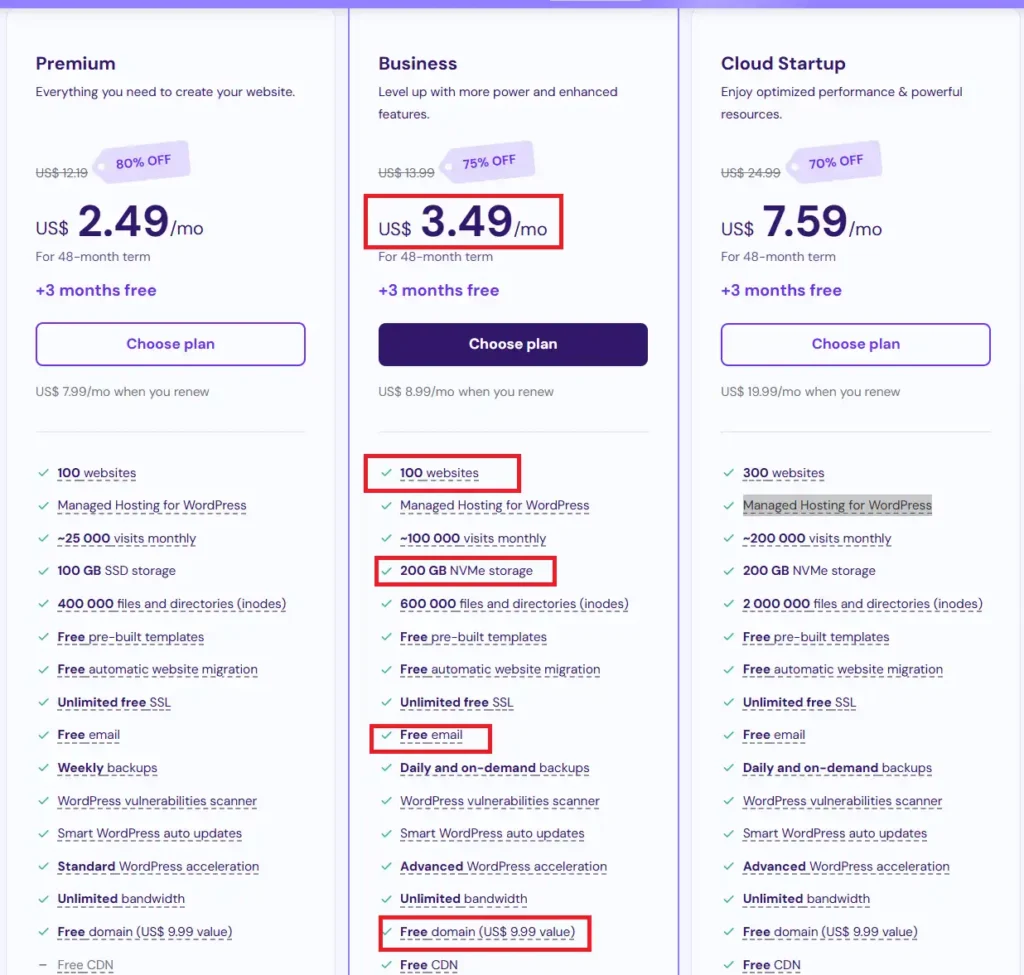
I recommend selecting the Business plan if you want to start a blog to generate income or launch an online brand.
The highlight of this plan is that you’ll get:
📌Create up to 100 websites
📌Free domain
📌Free domain privacy protection
📌Daily backup
Plus, it comes with a 30-day money-back guarantee, so there’s no risk in purchasing web hosting when you’re creating a website with Hostinger.
👉 Click here to head over to Hostinger and pick your plan.
After completing your payment, you’ll see a page asking “Who is this website for?”
1️⃣Select “myself or my business”

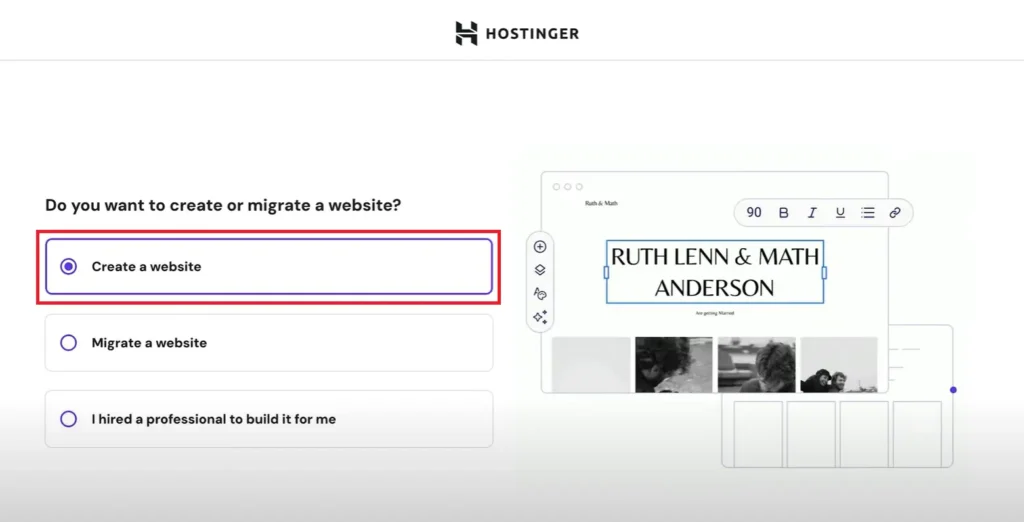
Next, you’ll see two options:
2️⃣Choose “Create a website” (not “migrate a website”)
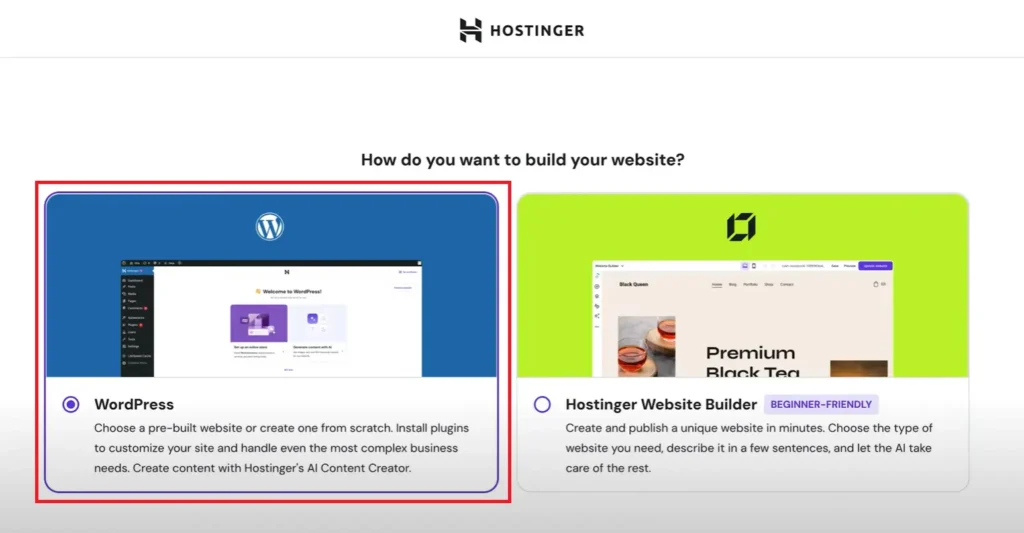
For your website builder:
3️⃣Select “WordPress”
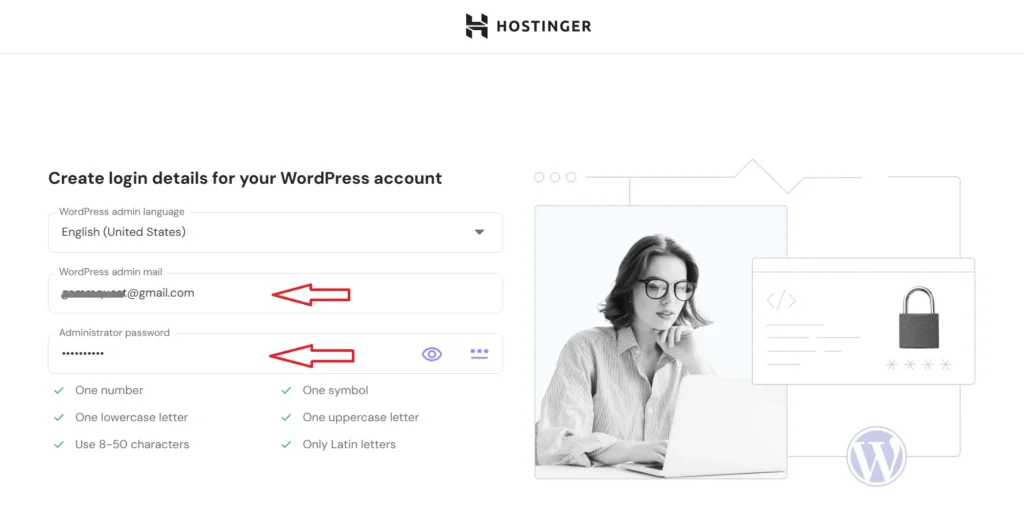
Now, create your WordPress login details:
4️⃣Enter your email and password in the boxes
Note: This email will be your WordPress Admin login – you’ll use this email and password every time you access your WordPress dashboard.
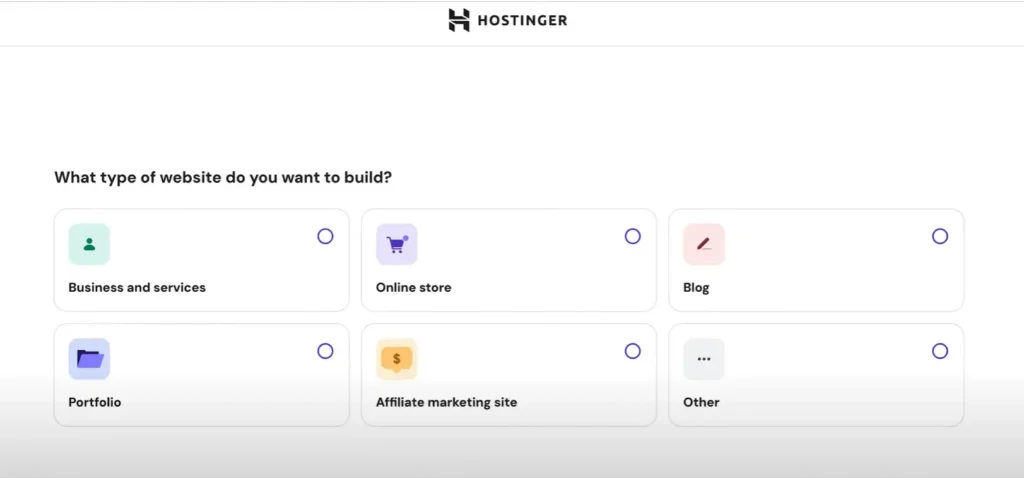
Next, it’ll ask “What kind of website do you want to build?”
5️⃣Select either “Blog” or “Business” website. Don’t stress about this choice – you’ll have access to templates for all types of websites regardless of what you pick here.
Time to claim your domain! Take a moment to think about your domain name. You’ll want something that’s:
💡Easy to remember
💡Simple to spell
💡Related to what your website is about

For domain registration:
6️⃣Select “Company” if you’re building a business website
7️⃣Fill in the form to register your domain
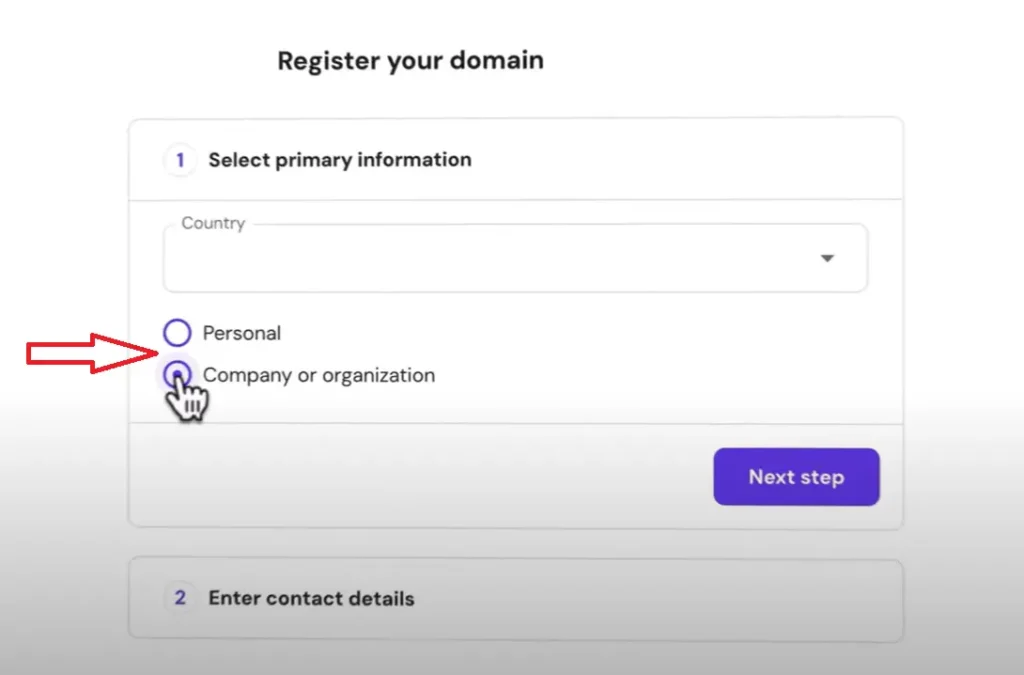
After registering your domain, WordPress will begin installing on your new domain name.
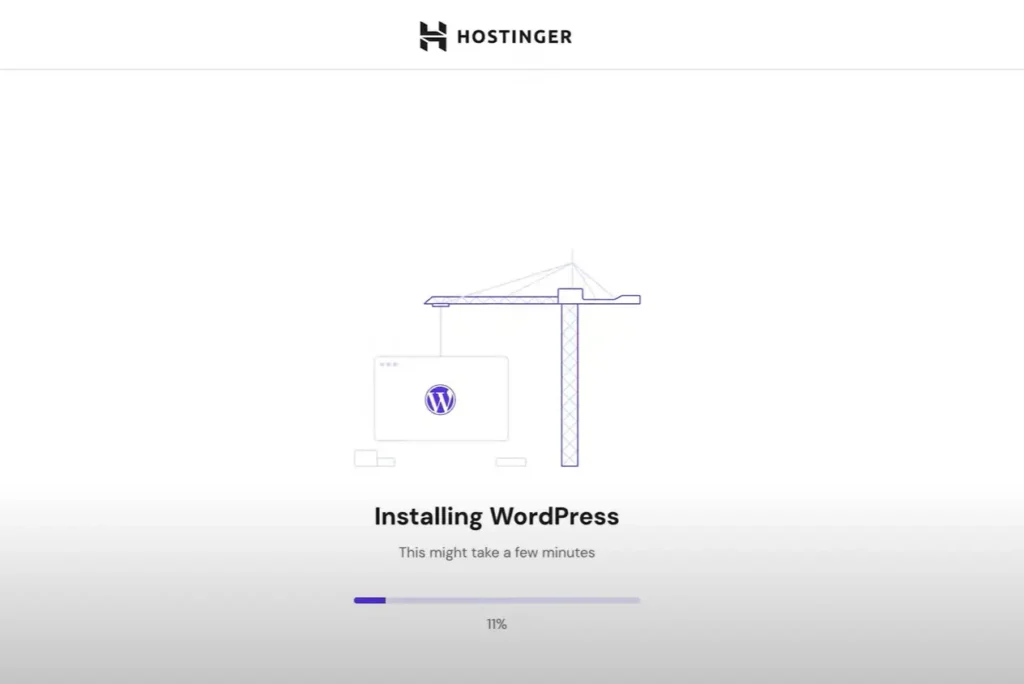
Once installation completes, you’ll see the Dashboard. Your website might go live immediately, but sometimes it can take up to 10 minutes.
If you click on “WordPress Admin” and get redirected to the WordPress Dashboard – congratulations, your website is live! 🎉

🔑IMPORTANT NOTE: Hostinger will send you an email to verify your address. Make sure to check your email and click the “Verify your email” link to get your website live immediately.
On the left side of your dashboard, you’ll find the backend of your website where you can create blog posts, add images, create pages, and more.

Now that you’ve got your WordPress site set up, let’s dive into the fun part – making it look exactly how you want! In the next section, I’ll show you how to navigate your WordPress dashboard and transform your blank canvas into a stunning website.
Step3: Design and customize your website
If you’ve chosen WordPress as your website platform (excellent choice!), let’s dive into making it uniquely yours. Now that you’ve got WordPress installed, it’s time to transform it into your dream website. You’ll be working in the WordPress dashboard, which is like your website’s control center. You can access it by typing yourwebsite.com/wp-admin in your browser.
To get a clear idea about how to use all its features, you can check out WordPress Dashboard Guide for a complete walkthrough.
Once you’ve logged in, you can see your WordPress dashboard like this:

Now that you’re in your WordPress dashboard, let’s make your website look amazing! First things first – we need to choose a theme that’ll serve as the foundation for your design.
Head over to Appearance > Themes > Add new and search for the “Hello” theme. This is a clean, lightweight theme that works perfectly with our next tool. Install it and hit that “Activate” button to get it running.

Here comes the fun part! Let’s install Elementor page builder – it’s like having a professional designer at your fingertips. Trust me, this tool is a game-changer: you’ll be able to create stunning pages just by dragging and dropping elements around. No coding needed!
To get Elementor, go to Plugins > Add new, search for “Elementor”, then install and activate it.

It’s incredibly simple and straightforward to use — just drag and drop elements to build your pages exactly how you want them. And if you ever get stuck, there are tons of helpful tutorials on YouTube that walk you through every step.
Once you’ve designed your pages (don’t forget essentials like About Us, Contact Us, and a Privacy Policy for your website), there’s one important step left. You’ll need to tell WordPress which page should be your homepage. Here’s how:
- Go to “Settings” in your WordPress dashboard
- Click on “Reading”
- Under “Your homepage displays”, select your newly designed page
- Don’t forget to save your changes!

Ready for the big reveal? Type your domain name into your browser and… tada! There’s your beautiful new website! 🎉
💼 Bonus Tip: Make It Official with an LLC
Before you start adding content to your new website, it’s a smart move to register your business legally. An LLC (Limited Liability Company) protects your personal assets and makes your business feel more professional from the start.
👉 Click here to set up your LLC with Tailor Brands — it only takes a few minutes!
Taking Flight: Launch and Growth
Ready for takeoff? Before you hit that publish button, double-check these basics:
🚨Test all your links
🚨Make sure your contact forms work
🚨Check your website on different devices
🚨Install an SEO plugin like [Yoast SEO] to help people find you
🚨Set up [Google Analytics] to understand your visitors
Remember, a website is never really “finished” – it grows and evolves with you. Start simple, learn as you go, and keep improving based on what your visitors need.
As you grow you can scale your website with higher plans at Hostinger.
Your Next Steps:
Essential Tools to Level Up Your Website
Before you go, let me share some awesome tools that’ll help take your website to the next level:
✅Tailor Brands: This is an all-in-one platform that helps protect your business by making it easy to register your LLC, even if you have no legal experience. Perfect for beginners starting an online business, it simplifies the process and gets your business legally set up in minutes.
✅Systeme.io: This is an all-in-one tool that helps you build your email list, send beautiful emails, and stay connected with your website visitors. It’s perfect for beginners to create landing pages, sales funnels, and even online courses — all in one place.
✅Beehiiv: A powerful newsletter platform built for creators and online entrepreneurs. It helps you grow and monetize your email list with built-in referral programs and audience analytics.
✅Google Search Console: The essential tool for getting your website listed in Google’s search results. Setting this up is your first step to becoming visible in Google searches and attracting organic traffic.
✅Google Analytics: Google’s free tool that reveals exactly how your website is performing. Track your traffic, understand your audience, and make data-driven decisions to grow your online presence.
✅WP Buffs: A comprehensive 24/7 WordPress management service that handles all the technical stuff for you. They take care of updates, security monitoring, and performance optimization while you focus on growing your site.
🔍You might also enjoy the following posts:
👉 Top 7 Best AI Website Builders for Fast and Easy Design
👉 Top 5 eCommerce Website Builders for Small Business Owners
